
End your ironing struggles: You’re using your ironing board incorrectly. 4 professional tips to double your efficiency
https://www.aregultion.com/ultimate-guide-to-ironing-mastery-board-hacks/
Do you find ironing an endless physical struggle? You invest your time, push the iron, and still end up with wrinkles? The core of the problem might not be that your iron isn’t hot enough, but that you’re not using your ironing board like a pro efficiency expert .
Many people simply view an ironing board as a makeshift support, completely ignoring its ergonomic design and hidden functions . Professional tailors and housework experts understand that efficient ironing requires the perfect collaboration between the person, the iron, and the ironing board .
In this article, we’ll uncover four ironing board mistakes you might be making and share pro tips you can put into practice right away on how to take advantage of your ironing board’s design, cut your ironing time in half , and easily achieve the professional-grade flatness you deserve.

Mistake 1: Ironing at the wrong height – you’re wasting energy
If you experience back pain while ironing, it’s because your ironing board isn’t adjusted to the perfect height for you. The incorrect height forces you to bend over or raise your arms, turning ironing into an unnecessary chore.
Pro Tip: Find Your Golden Height
Your ironing board should adapt to your body, not the other way around.
Standard: Match your elbows: Adjust the ironing board to the level of your elbows (or slightly below) when you are standing . This height allows you to stand in the most relaxed position and use your body weight to apply downward pressure .
Benefit: The correct height can significantly reduce the frequency of bending and raising your arms, ultimately relieving back and shoulder fatigue, allowing you to stay focused and productive for longer.
Mistake 2: Ignoring the Heat Reflector Potential of the Panel
If you have to iron the same garment inside out twice, congratulations, you’re wasting twice as much time. Your ironing board shouldn’t absorb heat; it should bounce it back .
Pro tip: Activate double-sided ironing mode
Check your panel covers: Traditional cotton panel covers absorb heat. High-performance panel covers should include a heat-reflective coating (usually silver or aluminum). This coating bounces heat and steam back to the bottom of the clothes.
Low-cost tech: The aluminum foil trick: If you don’t want to buy a new ironing board cover, place a layer of aluminum foil (shiny side up) on the metal surface of your ironing board and then cover it with your old ironing board cover. The aluminum foil acts as a powerful heat reflector, allowing you to iron the bottom surface while you iron, instantly doubling your efficiency .
Mistake #3: Using the pointed end of the board as a normal surface
Have you ever struggled to center your collar or cuffs on an ironing board? The ironing board’s tapering silhouette isn’t a random design choice; it’s a professional tool designed to handle curves and details .
Pro Tip: Use the Point Like a Tailor
Make full use of the “nose”: The pointed nose of the ironing board is specially designed for ironing the curved parts such as shirt collars, cuffs and shoulders**.
Collars and cuffs: Pull the collar or cuffs completely over the tips. This allows them to be ironed smoothly and avoids creating new wrinkles at the edges .
Shoulder Contouring: Pulling the shirt shoulders over the tips makes it easy to work around the curved shoulder area.
Optimize the ironing sequence: Always iron the details first and the larger areas last. Iron the collar, cuffs, and placket first, and the larger areas of the body last, ensuring that the larger areas are perfectly flat in the final step.
Mistake 4: Folding and storing immediately after ironing
This is a maintenance mistake that can damage your tools and accelerate their wear and tear. Ironing creates a lot of steam and moisture, and storing them immediately traps that moisture inside.
Professional tips: Moisture-proof and ventilation are the secrets to longevity
Ventilation is key: Don’t put the ironing board away immediately after ironing . Loosen or lift the cover and allow the metal plate and padding underneath to air dry for at least 10 to 15 minutes.
Avoid damage: This simple step ensures that any remaining steam dissipates, preventing rust on the metal frame and board, and mold on the cover . It’s the simplest, yet most important, step to extending the life of your ironing board.
Summary and sublimation: from housework to efficient processes
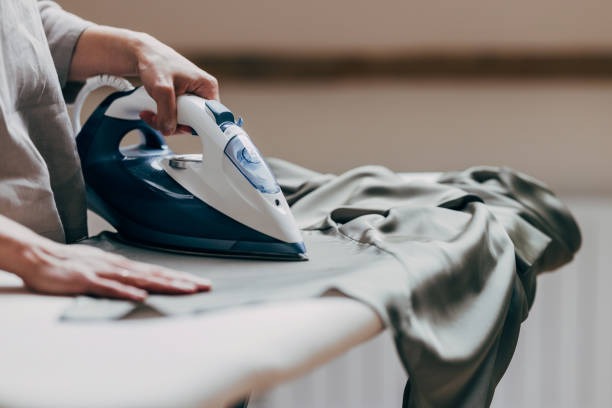
Ironing is no longer a chore; it’s more of a process. By adjusting the height of the ironing board to fit your body, utilizing heat reflection for efficiency, and using the pointed contours to handle details, you’ll not only complete the task faster, but also better protect your tools, keeping your clothes flatter for longer.
Now that you’ve mastered these pro tips, which technique would you say will make you feel the most efficient when ironing? Activating the double-sided ironing technique , or using the pointed tip correctly to achieve the fine details ?
https://www.aregultion.com/ultimate-guide-to-ironing-mastery-board-hacks/


