
Eliminating the noise: Why your ironing board is always whispering
https://www.aregultion.com/the-ultimate-guide-to-ironing-board-performance-roi-active-technology-and-maintenance/
It’s a simple yet frustrating daily ritual: setting up your ironing board , only to be greeted by a wave of squeaks, groans, and unsettling wobbles . This rhythmic creaking is more than just an annoyance; it’s a sign that your ironing board’s structure is compromised, slowing down your work and making the entire ironing experience feel unstable.
If your home helper sounds less like a quiet tool and more like a poorly lubricated merry-go-round, it’s time for an in-depth diagnosis. We’ll show you exactly where the noise is coming from, how to perform a simple DIY fix, and why a little strategic lubrication can extend the life of your ironing board by years. Let’s quiet that ironing board once and for all .
Part 1: The Source of Noise— Three Structural Reasons for Squeaky Ironing Boards
Understanding the “why” is the first step to a permanent fix. Your ironing board is a collection of moving metal parts, and when those parts are dry, loose, or physically damaged, they make noise.
Metal-on-metal friction: The dilemma of dry hinges
This is the most common squeaking sound. Ironing boards rely on hinges, slides, and cross braces, which rub against each other when they are set up, put away, and stressed.
The culprit: Factory grease or lubricant that dries out over time. When dry metal parts move under the weight of the iron, they produce a high-pitched squeaking sound .
Rivet Trap: Pay special attention to the rivets . Many cheap ironing boards use non-removable rivets to connect the main support members. Once these rivets wear out and create friction, they are almost impossible to tighten, which means the squeaking often becomes permanent—a key difference between a quality product and a cheap one.
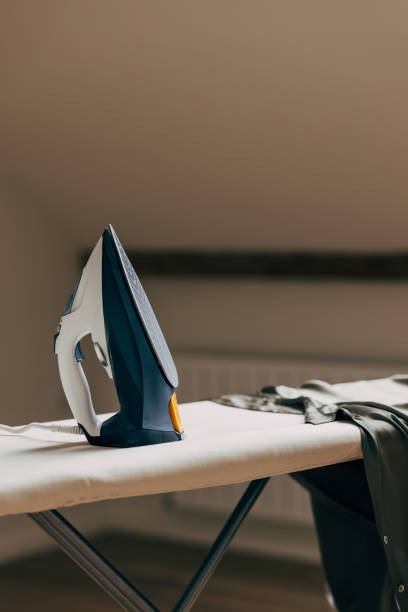
Loose connections: the source of shaking and groaning
If your ironing board feels unstable or makes a dull “groaning” or “banging” sound when you press on it, the problem is most likely mechanical.
The problem: Especially with floor-standing ironing boards , the core bolts or nuts that secure the leg assembly can gradually loosen due to repeated folding and long-term stress. This loosening creates gaps in the structure, causing the ironing board to wobble and rattle under pressure.
Repair Tip: Thankfully, if your board uses bolts and nuts , this is one of the easiest issues to fix with simple tools. This kind of structural flexibility is a sign of good design.
Internal Rust and Corrosion: The Consequences of Steam Traps
a silent, hidden killer that shortens the life of your ironing board .
Origin: When you use a steam iron, moisture must escape through the perforated metal grid. If you put away the ironing board immediately after use , the trapped steam (moisture) can cause rust to form on the inside .
Consequences: Rust alters the smoothness of the metal surface, causing a grinding sound when folding. More importantly, it weakens the structural integrity of the metal grid and folding joints . This is why proper ironing board maintenance is crucial, not only for quiet operation but also for the longevity of the ironing board .
Part 2: DIY Fix – A Step-by-Step Guide to Making Your Ironing Board Quiet Again
You don’t need to call a mechanic to fix a noisy board. With a little time and some simple household items, you can restore its stability.
Step 1: Pinpoint the Noise Source and Prepare Your Tool Kit
To locate the source: Fully open and lock the ironing board . Apply pressure (simulate ironing) while listening carefully to the exact location of the squeak or wobbling (hinges, height locks, cross supports).
Tools: Get a Phillips screwdriver , a set of wrenches (for the nuts), and a high-intensity flashlight.
Step 2: Tighten all bolts to eliminate play
Target loose points: Focus on the main structural legs. Using a wrench and screwdriver, simultaneously hold the bolt heads and tighten all exposed connections until the ironing board is structurally stable.
Notes: Be careful not to overtighten, as this may damage the threads or distort the metal structure.
Step 3: Lubricate friction points to eliminate squeaking
The right lubricant: Use a penetrating lubricant like WD-40 , or better yet, silicone spray or graphite lubricant (which won’t attract dust or stain clothing in the long run).
Application: Spray or apply lubricant directly to all metal friction points ( around rivets , inside slide rails).
Work penetration: Fold and unfold the ironing board back and forth several times to allow the lubricant to fully penetrate deep into the friction points.
Final Wipe: It is crucial to wipe off any excess lubricant with a rag to prevent the oil from transferring to your clothing the next time you use it.
Step 4: Panel care and rust prevention for a truly long ironing board life
Rust removal: If slight surface rust is found, it is recommended to use fine sandpaper or a wire brush to gently remove the loose rust.
Prevention is key: Use the ten-minute cool-down rule . After ironing, leave the ironing board fully extended for at least ten minutes to allow any remaining steam to dissipate and avoid storing it damp.
Part 3: Ironing Board Quality – The Hidden Cost of Noise
The Noise Trap of Cheap Ironing Boards : Why They’re Destined to Squeak
Design flaw: Low-cost ironing boards are often designed to be disposable. They rely heavily on thin steel and rivets —permanent metal pins that can’t be tightened. Once the rivets wear out, the metal parts will rattle, and the wobble problem is irreversible .
Result: You’re forced to replace early, which means the initial “bargain” price advantage quickly disappears.
An investment in stability: the return on investment (ROI) of a quiet and stable ironing board
Lifetime Value: A high-quality ironing board (with bolted construction and thick steel) will have a structural lifespan of over 100 years. While the initial cost is higher, the cost per use is much lower than a cheaper model that needs to be replaced every few years.
Physical and mental ROI: Noise and vibration are not only distractions, but also sources of physical stress. A stable, quiet board allows you to efficiently apply even, steady pressure, saving time and reducing back strain—a valuable return on your investment.

Ironing Board Noise/Shake FAQs Quick Answers
| question | Answer |
| Q1: Will using lubricant stain my clothes? | A: Only if overused. Use a dry-type spray such as silicone or graphite lubricant . Be sure to wipe off all excess residue before the next use. |
| Q2: How to determine whether the ironing board should be scrapped? | A: When the legs cannot be locked securely, the frame is severely deformed, or the metal panels have large areas of rust and perforation, endangering stability, you should consider scrapping. |
| Q3: The new board I just bought is shaking, why? | A: This is usually caused by loose bolts during shipping or a design defect. If the shaking persists, contact the manufacturer immediately for a replacement or refund; a new ironing board should be very stable. |
Conclusion: Maintain your ironing board and enjoy peaceful ironing time
A squeaky ironing board isn’t a fate you have to accept; it’s a simple matter that can significantly improve your quality of life and efficiency. By investing a few minutes in tightening and lubricating it , you can restore its stability and quietness.
The noise is just a symptom. The real lesson is that stability is the ultimate measure of quality. Shaking and constant squeaking are signs of a low-quality design destined for the landfill.
Now, tell us—which part of your ironing board needs the most attention right now? Share your specific source of noise in the comments below, and we’ll figure it out together!
https://www.aregultion.com/the-ultimate-guide-to-ironing-board-performance-roi-active-technology-and-maintenance/


